

Table of Contents
- What Dog Communication Buttons Are and How They Actually Work
- How to Set Up Dog Communication Buttons in Your Home
- Best Words to Teach a Dog With Buttons First
- Modeling, Prompting, and Waiting for Independent Presses
- How Long Does It Take for a Dog to Learn Buttons?
- Dog Talking Button Training Tips That Hold Up
- Troubleshooting by Cause: When Progress Stalls
- Conclusion: Build the Vocabulary Your Dog Can Actually Use
- Frequently Asked Questions
Last Updated: October 5, 2026
What Dog Communication Buttons Are and How They Actually Work
Dog communication buttons are recordable sound devices that let a dog press a pad to trigger a spoken word, such as "outside," "play," or "eat." Each button holds one recorded word, and the dog learns to connect the press with a real outcome.
A button press shows your dog has paired a sound with a result, not that they are forming sentences or using grammar. The research on animal language is still young.
The Limits of the Evidence
Button use is a trained behavior, and the evidence is promising but limited. A dog that presses "walk" may be requesting a walk, or may simply have learned the press predicts one, indistinguishable from the outside.
What matters is your own dog's progress, not headlines. Keep expectations grounded:
- Watch for clear, repeated patterns before calling a press intentional
- Track which buttons your dog uses and when
- Treat accidental presses as noise
That mindset keeps training calm and protects your dog from pressure to perform.
How to Set Up Dog Communication Buttons in Your Home
Place the buttons where your dog already spends time and where you can respond quickly, a low-traffic corner of the living room or beside the door. The setup should be reachable, stable, and easy to clean.
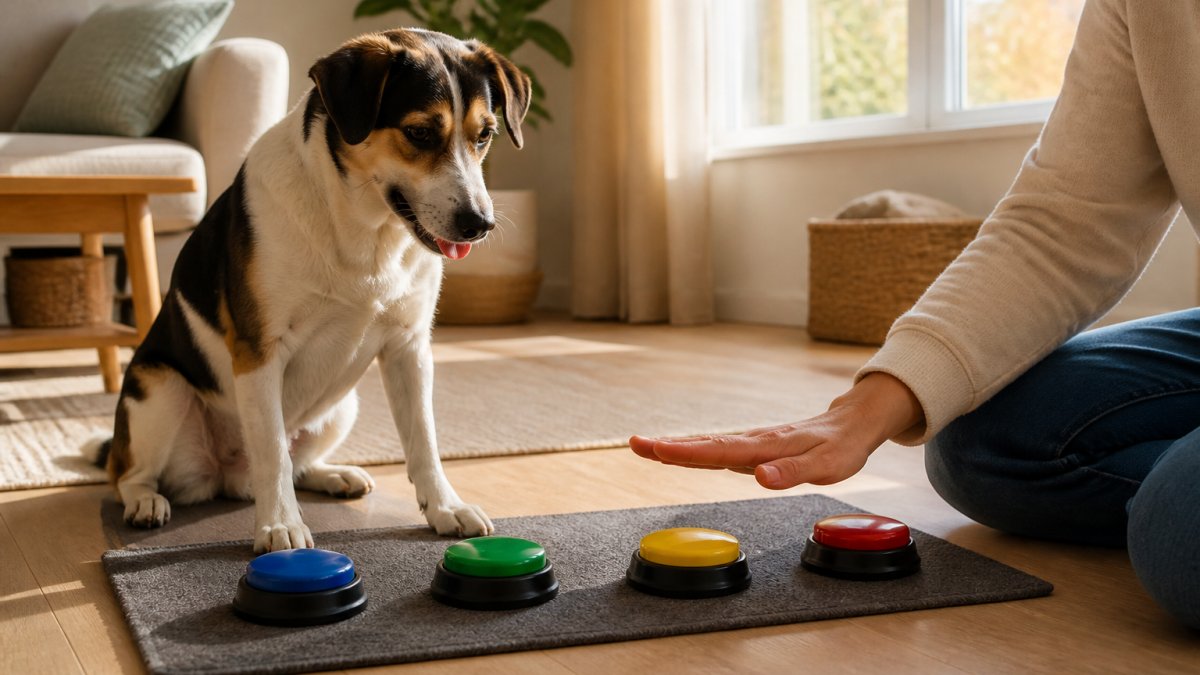
Most guides stop at "put the buttons on the floor." That fails for small dogs, seniors, dogs with mobility limits, and dogs who startle at sounds. Build the setup around your specific dog.
Match button height and spacing to your dog
A button your dog cannot comfortably reach will not get pressed, however well you model it.
- Standing height: The pad should sit at or just below your dog's lowered paw or nose, so a press needs no stretch, jump, or crouch. A flat mat suits most medium and large dogs; for small breeds, seniors, or dogs with arthritis, raise it on a low, non-slip platform closer to nose level.
- Spacing: Leave roughly a paw-width, about 2 to 3 inches, between buttons so one press triggers one button, not two. Dogs with wide stances or poor aim need more space.
- Stability: A sliding mat teaches your dog that pressing is unreliable. Use a rubber-backed mat, weighted tray, or hook-and-loop fasteners to hold each button in place.
Adapt for dogs who cannot paw or nose-press
Not every dog can or should press with a paw. Adaptations that work:
- Nose targets: Mount buttons on a wall or low board at nose height for dogs who nose-boop more naturally than they paw.
- Mouth or chin targets: For dogs with limited front-leg use, position a button where a chin rest or light mouth touch triggers it.
- Target stick or ramp: A dog who can only reach a short distance can learn to touch a target resting on a button.
Tune sound and sensory load
- Volume: Record at a volume your dog can hear without startling. If your dog flinches or avoids the mat, lower the volume or move to a softer surface.
- Sound sensitivity: Dogs who react to sudden noises may do better with a single button at first, away from echoing hallways or hard floors.
- Visual clutter: High-contrast buttons on a plain mat are easier to tell apart than a crowded rainbow board. Color-coding helps humans; your dog learns position and sound more than color.
Set up for household consistency
A button means nothing if two people respond to it differently. Before you add a second button:
- Agree on one word per button and write it down.
- Agree on the exact outcome each word produces, "outside" always means the door opens, not sometimes a walk and sometimes nothing.
- Agree on who responds and how fast.
- Add duplicate mats only after the first location is reliable, keeping the same word meanings everywhere.
Follow these steps to set up dog communication buttons:
- Pick a flat, stable surface your dog can reach without stretching.
- Space the buttons about one paw-width apart so a paw hits one at a time.
- Record one clear word per button in your normal voice at a comfortable volume.
- Keep the mat in the same spot every day.
- Start with one button, not six.
- Write down the word and its outcome, and share it with the household.
A durable option is our 4 Colors Pet Communication Button ($33.48). It is made of ABS plastic, records with a long press, and measures 8.5cm x 8.5cm x 4.1cm. It comes in orange, blue, gray, and yellow, each with a battery included.

Best Words to Teach a Dog With Buttons First
The best first word is one your dog already understands and cares about, tied to something that happens many times a day, so you get plenty of practice. Common first words include "outside," "eat," "potty," "play," and "walk."
Avoid abstract words at the start. "Love" and "later" give your dog nothing to act on. A good first word has a clear, fast consequence.
Modeling, Prompting, and Waiting for Independent Presses
Modeling means you press the button yourself and then deliver the outcome. If you press "outside," you open the door.
Prompting is a gentle nudge, such as guiding your dog's paw toward the button.
Then comes the hard part: waiting. After you model, pause and give your dog time to try. A few quiet seconds often do more than a dozen prompts.
Responding Consistently to Every Press
Every press should lead to the same result, every time. If "outside" sometimes means a walk and sometimes means nothing, the word loses its meaning. Consistency is what turns a sound into a real request.
That does not mean obeying every press forever, just that during training your response should be predictable. If you cannot respond, do not model that button in that moment.
How Long Does It Take for a Dog to Learn Buttons?
Most dogs need weeks to months of steady practice before they press with clear intent. Some pick it up in days; others take far longer.
There is no fixed timeline. What predicts success is repetition and consistency, not talent. A dog that practices a little every day usually beats one that trains hard once a week.
Track progress in a simple log:
4 Colors Pet Communication Button One-click Prevent Physical Inactivity →
- Date and button used
- Whether the press looked intentional
- What outcome you gave
After a month, patterns will show. That log is more useful than any general timeline.
Dog Talking Button Training Tips That Hold Up
Keep sessions short and end on a success. Two or three minutes, a few times a day, beats one long session.
Practice inside your everyday routine. Press "eat" before meals and "outside" before the door. Real context makes the word stick.
Add new words slowly. One new button at a time, and only after the first one is reliable. A crowded soundboard confuses more than it teaches.
Avoiding the Treat-Button Trap
If every press earns a treat, your dog learns to press for food, not to communicate. Use the real outcome instead: "play" leads to play, "outside" leads to the door. Food is fine for some buttons, but not all.
Troubleshooting by Cause: When Progress Stalls
When training stalls, find the cause before you change the plan. Changing three things at once tells you nothing about which one worked. Work through the causes below in order, fix the simplest first, then give it a full week before changing anything else.
Start with a measurable baseline
Vague milestones ("he kind of gets it") hide real progress. Track three numbers:
- Independent presses: presses made without a prompt or a model.
- Context-appropriate use: presses that match the situation, "outside" near the door, not at random.
- Response consistency: how often the same button produces the same outcome from you.
A simple weekly log is enough:
| Day | Button | Prompted or independent? | Context fit? | Outcome given |
|---|---|---|---|---|
| Mon | outside | independent | yes | door opened |
| Tue | outside | prompted | yes | door opened |
| Wed | play | independent | no | redirected, no play |
After two weeks, look for trends, not single days. Rising independent presses and steady context fit mean the plan is working even if it feels slow.
A four-week starter plan
Adjust the pace to your dog, but keep the structure.
- Week 1, One button, heavy modeling. Model several times a day in real moments and deliver the outcome every time. Do not prompt yet.
- Week 2, Model, then wait. Model once, then pause five to ten seconds and give your dog room to try. Log every press.
- Week 3, Reduce modeling. Model only when your dog is clearly in the matching situation. Reward independent presses immediately with the real outcome.
Decision tree by symptom
Dog ignores the buttons entirely.
- Is the mat in a spot your dog actually passes through? If not, move it.
- Is the button reachable without stretching? If not, adjust height.
- Are you modeling in real moments, or only in scheduled sessions? Model during the real event.
Dog presses constantly or randomly.
- Too many buttons too soon is the most common cause. Remove all but one.
- If one button is being spammed, check whether you have been rewarding every press with food. Switch to the real outcome.
- If presses cluster at a certain time of day, your dog may be bored or under-exercised. Add a walk or play session before training.
Dog presses the wrong button.
- Check spacing. Buttons too close together cause mis-hits.
- Check whether two buttons have similar sounds or outcomes. Make them more distinct.
- Do not scold. Deliver the outcome for the button actually pressed, then re-model the intended one later.
Dog only presses when prompted.
- You are likely modeling or cueing too much. Cut prompts and increase wait time.
- Make sure the outcome is worth pressing for. If "play" leads to two seconds of tug, it is not.
- Try capturing: wait until your dog naturally wants the thing, then model the button once and step back.
Progress stopped after a good start.
- Check household consistency. One person ignoring presses can undo weeks of work.
- Check session length. Short and daily beats long and rare.
- Check for pain or illness. A dog who suddenly stops using a button they knew well may be uncomfortable, not stubborn.
When to stop troubleshooting and check with a veterinarian
Buttons supplement observation, veterinary care, and ordinary communication, they do not replace them. If your dog stops eating, stops responding to their name, shows new limping, or seems painful when pressing, treat that as a health question first. Never withhold a need, food, water, a bathroom break, pain relief, to force a button press. A dog who is uncomfortable will not learn well, and withholding care to prompt communication is not training.
Conclusion: Build the Vocabulary Your Dog Can Actually Use
Teaching dog communication buttons is a slow, patient practice, and that is exactly what makes it worth doing. Start with one word, model it, wait, and respond the same way every time.
If you are ready to begin, ELTStores offers a simple, durable starting point. Our recordable button is easy to set up and built to last through daily use.
Frequently Asked Questions
Do dog communication buttons really work?
They work as a word-association tool, not as a language system. A dog presses a button, hears a spoken word, and gets a consistent outcome, such as going outside or getting a toy. That repetition builds a link between the button, the sound, and the result. What it does not prove is that your dog understands grammar or full sentences. Treat presses as requests and observations, and you will get honest value from the setup.
How many buttons should I start with?
Start with one or two. A single button for outside or potty keeps the lesson simple, because your dog only has one action to connect to one sound. Add a third button once the first one gets pressed on purpose, not by accident. Growing too fast creates a cluttered soundboard where your dog cannot tell which button does what, and progress slows rather than speeds up.
How do I avoid accidentally teaching my dog to press buttons for treats?
Never pair a button with food unless food is the honest outcome of that press. If your dog hits a treat button, give a treat. If your dog hits an outside button and then stares at you for a snack, open the door and skip the food. Mixed responses teach button pressing as a begging trick. Keep every press tied to its real consequence, and the vocabulary stays meaningful.
How should I respond when my dog presses a button?
Respond the same way every time. If your dog presses outside, open the door. If your dog presses play, pick up the toy. A consistent response is what turns a random paw tap into a real request. If you cannot honor the press right then, say the word, acknowledge it, and follow through within a minute or two. Silent or ignored presses are the fastest way to lose your dog's interest.